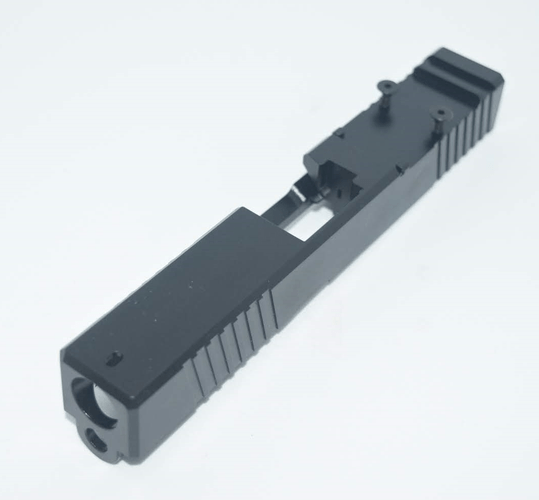
Installing a slide parts kit on a Glock 17 or Glock 19 can seem like a daunting task, but with the right information, it can be easily accomplished by anyone. Today, gun owners are becoming increasingly interested in maintaining and upgrading their weapons from the comfort of their own homes.
At 3CR Tactical, our Glock firearms experts are experienced in the effective disassembly of their sidearms. In this article, they describe everything you must know to assemble your Glock.
When must you assemble your own slide? How do you prepare, and what tools will you need? Discover how to assemble a Glock 17/Glock 19 slide, below.
What are Stripped and Completed Glock Slides?
If you’re shopping around for a slide for your Glock or Polymer80 build, you’ve probably seen them categorized as ‘stripped/bare’ or ‘complete.’ Slides are considered ‘complete’ when all major components are installed or included with the slide so that they’re ready to be mounted on the frame.
Slides are ‘stripped’ when the main slide is provided without internal parts, barrel, or sights installed. If you do end up buying a stripped slide, you’ll need to have a compatible parts kit to build it out.
Preparing to Assemble a Glock Slide
A couple of things to note here, Glock 19, Glock 17 and Glock 26 slide parts kits are usually interchangeable, except for the recoil rod (if it comes with one). A lot of kits don’t ship with a recoil rod, so it’s worth looking at the kit description to see if it does if you don’t have one.
We carry slide kits that come with or without the recoil rod if depending on your need. In fact, we offer much of the equipment you’d need to finish a Glock slide.
Tools You’ll Need to Assemble a Glock Slide
The tools you’ll need to get this done are pretty basic, but include:
- Jeweler’s/gunsmith’s hammer with flat and rubber tips.
- Nylon-tipped or steel punch set.
- Channel liner install tool.
- Glock sight install tool for iron sights.
How to Assemble a Glock Slide
Building out a slide isn’t as involved as a project like installing the Lower Parts Kit on an AR. However, you’re still dealing with small, spring loaded components, so keep a plastic bag handy.
Installing the plunger in a plastic bag can save you some grief in case you lose your grip and the top of the plunger goes flying off. Once you and your components are ready, follow these steps:
- Place the Firing Pin in its polymer retainer.
- Slide the Spring over the Firing Pin.
- Holding the Spring down, set the two retainer clips in place.This completes the Striker Assembly.
- Place one of the small springs into the Firing Pin Safety.
- Connect the other small spring onto the guide rod for the extractor.
- Install the spring loaded bearing on the open end of the safety plunger assembly. Compress against a hard surface to seat the bearing.
- Using your installation tool, gently but firmly, seat the Firing Pin Channel Liner into place. Do not force it in as this can cup the ends and interfere with motion of the striker assembly.
- Install the Firing Pin Safety.
- Depress the Firing Pin Safety and drop the extractor into place.
- Drop the extractor plunger assembly into place.
- Holding the Firing Pin Safety down, drop the Striker Assembly into place.
- Using a thin punch, depress the firing pin retainer so you can slide the back plate on to hold it in place. Move the punch to the spring loaded bearing and depress while simultaneously seating the back plate. New plates may need to be tapped into place to fully seat.
- Install the barrel and recoil spring assembly.
- Install the completed slide onto your Glock 17 or Glock 19.
Learn More About Proper Glock Slide Assembly at 3CR Tactical
Find the tools and knowledge you need to complete a Glock 19/17 slide assembly at 3CR Tactical. For more information on the products and equipment we offer, reach out to our team today.


